


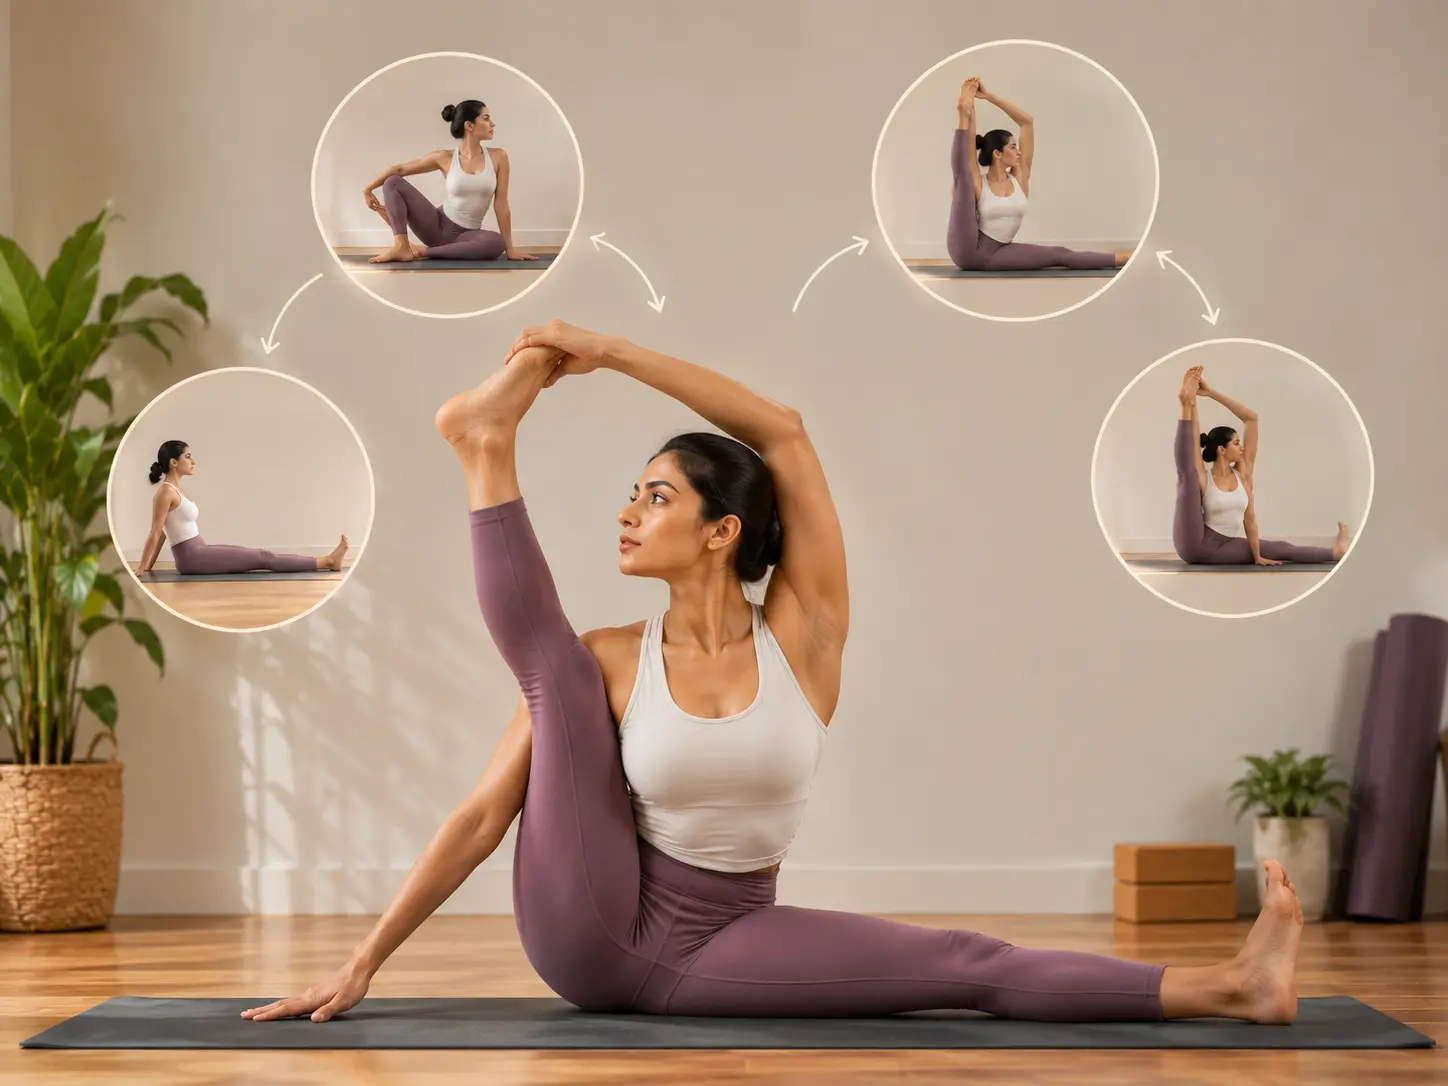

What is Eka Pada Sirsasana?
Eka Pada Sirsasana, or One-Leg-Behind-the-Head Pose, is an advanced yoga asana that requires a combination of flexibility, strength, and focus. In this posture, one leg is brought behind the head while the other leg remains grounded, challenging the practitioner’s hips, hamstrings, and spine. It is a common pose in Ashtanga yoga, particularly in the Advanced Series, and is renowned for its ability to improve hip mobility and spinal alignment. Practicing Eka Pada Sirsasana helps develop patience, balance, and inner focus, as it requires gradual preparation and mindful progression. This pose also stimulates the abdominal organs, improving digestion and detoxification. Due to its complexity, it is recommended to practice under the guidance of a skilled teacher to ensure safety and proper alignment.
Position type: Split
Posture type: Sitting
Ideal for: Flexibility and mobility
Targets: Hips and groin
Pose level: Advanced
How to Prepare for Eka Pada Sirsasana?
Preparing for Eka Pada Sirsasana requires gradually improving hip flexibility, hamstring mobility, and spinal awareness while developing strength and control to safely achieve this advanced posture.
- Hip Flexibility: Work on deep hip-openers such as Pigeon Pose, Lizard Pose, Garland Pose, and Bound Angle Pose to loosen the hip joints and improve external rotation. Incorporate dynamic flows like Low Lunge to Half Splits to ease into flexibility.
- Hamstring Mobility: Stretch and lengthen the hamstrings with poses like Reclined Hand-to-Big-Toe Pose, Pyramid Pose, and Wide-Legged Forward Bend. These poses help create the necessary range of motion for the leg to move behind the head.
- Spinal Awareness and Strength: Practice poses like Cat-Cow, Cobra Pose, and Seated Forward Bend to warm up and strengthen the spine. Gentle twisting poses such as Half Lord of the Fishes can also enhance spinal mobility.
- Core Engagement: Build stability and strength with Boat Pose, Plank Pose, and Side Plank, as core control is essential to maintaining balance and alignment in Eka Pada Sirsasana. Regular practice of these preparatory poses will help you ease into this challenging asana.
How to do Eka Pada Sirsasana?
Getting into the Posture:
- Sit with your legs extended forward and your back straight. Rest your palms on the floor beside your hips. Take a few deep breaths to center yourself.
- Bend your right knee and cradle your right leg in your arms, holding the shin and foot. Gently rock the leg back and forth to warm up the hip joint.
- Hold your right ankle with both hands and carefully guide your right foot toward your right shoulder or the side of your head. Keep the movement slow and mindful to avoid strain.
- Lean slightly back and gently maneuver your right leg over your right shoulder. Gradually work the foot behind your head, allowing the calf to rest on the back of your neck.
- Sit up tall, ensuring your back is straight and your core is engaged. If comfortable, clasp your hands in front of your chest in Anjali Mudra (Prayer Pose) to deepen the posture.
- Maintain the posture for 5–10 breaths, keeping your shoulders relaxed and your gaze steady. Focus on even breathing and maintaining balance.
Getting out of the Posture:
- To exit, carefully lift the leg off your neck, reversing the steps. Stretch both legs forward in Dandasana and take a few breaths before repeating on the other side.
Key Alignments in Eka Pada Sirsasana:
- Keep the spine long and upright; avoid rounding the back to maintain stability and balance.
- Ensure the lifted hip is externally rotated, and both hips remain grounded evenly on the mat.
- Place the leg gently behind the neck, avoiding excessive pressure on the cervical spine.
What are the Benefits of Eka Pada Sirsasana?
Physically, Eka Pada Sirsasana enhances hip flexibility, hamstring mobility, and spinal strength, promoting better posture and alignment. The deep stretch improves circulation to the lower back, hips, and legs, aiding in muscle recovery and joint health. This pose also strengthens the core and stabilizing muscles, contributing to overall balance and control. Mentally, it cultivates patience, concentration, and resilience as practitioners work through its challenges. The pose also stimulates abdominal organs, supporting digestion and detoxification. With consistent practice, Eka Pada Sirsasana can help deepen your body awareness and refine your practice.
What are the Contraindications of Eka Pada Sirsasana?
Eka Pada Sirsasana is an advanced pose and should be avoided by individuals with certain conditions to prevent injury. People with neck issues, such as cervical spondylosis or herniated discs, should refrain from practicing this pose due to the strain it places on the neck. Those with hip, knee, or hamstring injuries must also avoid this posture, as it involves deep stretches and external rotation. Pregnant women should skip this pose to prevent pressure on the abdomen and spine. Practitioners with lower back pain or sciatica should exercise caution or avoid this asana altogether. It’s essential to warm up properly and practice under expert guidance to ensure safety and alignment.
What are the counter poses for Eka Pada Sirsasana?
Practice Dandasana, the Staff Pose or sit in Sukhasana, the Easy Pose for a few minutes after doing Eka Pada Sirsasana.
Variations of Eka Pada Sirsasana:
Easy Variations:
- Half Eka Pada Sirsasana (Foot-to-Shoulder Pose):
Instead of bringing the leg behind the head, rest the foot on the same-side shoulder while keeping the spine upright. This reduces strain on the hips and neck. - Reclined Eka Pada Sirsasana:
Lie on your back and guide one leg toward your shoulder or behind the head while keeping the opposite leg extended on the ground. This variation offers more support and reduces pressure on the spine.
Advanced Variations:
- Eka Pada Sirsasana with Arm Balance:
From Eka Pada Sirsasana, place your palms on the floor and lift the hips off the ground, transitioning into an arm balance. This requires core strength and balance. - Double Leg Behind the Head (Dwi Pada Sirsasana):
Progress to placing both legs behind the head, sitting upright. This variation demands exceptional hip flexibility, spinal strength, and stability.
Advice for Beginners:
For those attempting Eka Pada Sirsasana for the first time, it's important to approach the pose with patience and caution. Start by building foundational flexibility in the hips, hamstrings, and spine. Never force the leg behind the head - listen to your body and take it slow. It’s helpful to practice under the guidance of an experienced teacher to ensure correct alignment and avoid injury. Use props like blankets or blocks to support the legs and hips if needed, and always remember that consistency and gradual progression are key.
Shvasa Tips for Eka Pada Sirsasana:
- Focus on hip openers and hamstring stretches before attempting the pose. Maintain core stability to protect the lower back and aid balance.
- Go at your own pace and use props for support if needed. Never force the leg behind the head.
- Always practice under the guidance of a skilled teacher to ensure proper alignment and avoid injury.
Learn how to practice Eka Pada Sirsasana live with experienced yoga teachers on Shvasa.




%201.svg)


%201.png)


%201.svg)